

Cisco Identity Services Engine (ISE) is a next-generation identity and access control policy platform that enables enterprises to enforce compliance, enhance infrastructure security, and streamline their service operations. - Cisco
While running Cisco ISE on Nutanix is not officially supported by Cisco, it is possible with a few simple adjustments made via the acli command line. Although AHV isn't listed, Cisco does support KVM.
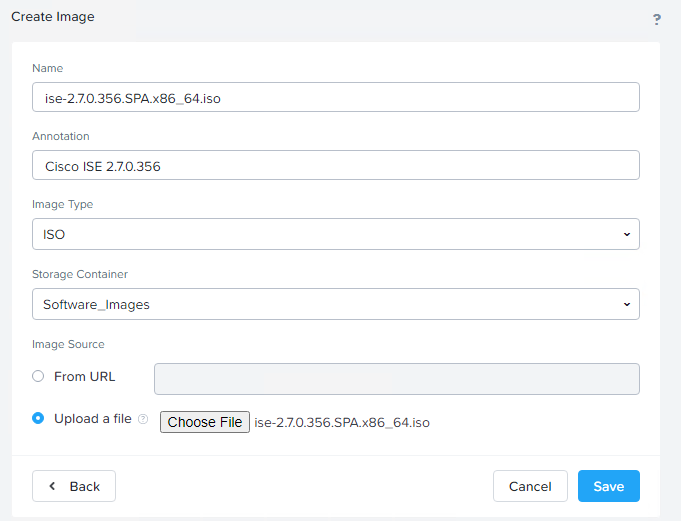
- Download the installation ISO from Cisco. At this time I have tested both ise-2.6.0.156.SPA.x86_64.iso and ise-2.7.0.356.SPA.x86_64.iso
- Login to Prism Element, then select Settings, Image Configuration.
- Select Upload Image, then name the Image. Typically I use the file name here. Choose Image Type ISO, and upload from a file. Select your ISO and Save. It will take several minutes to uploaded process the image. Once complete, proceed to the next step.
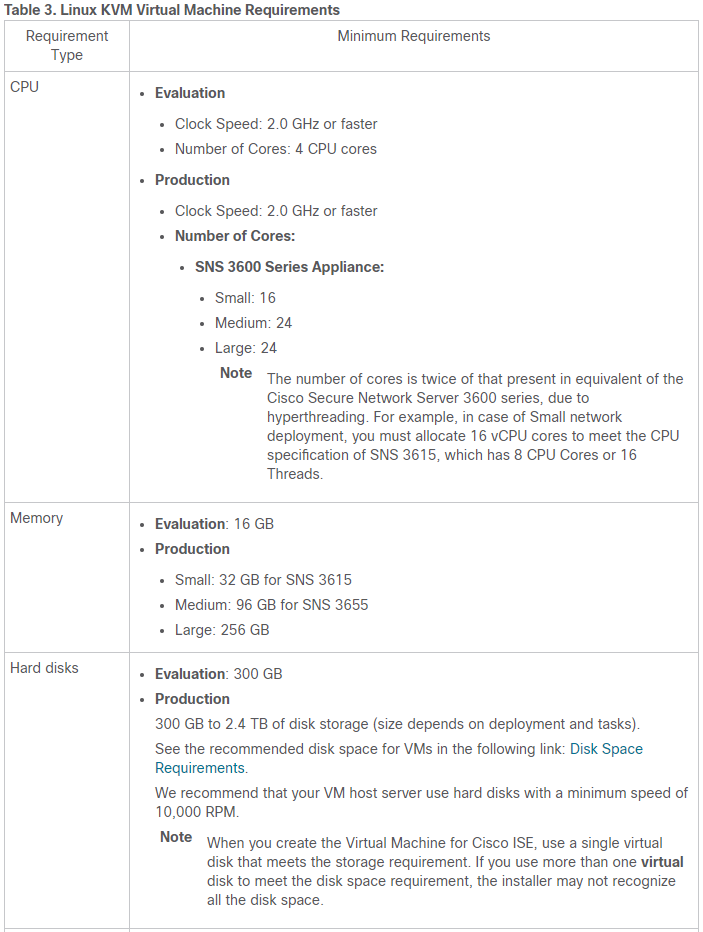
4. Browse to the VM's page and select Create VM. Name your VM and select the appropriate Timezone. Cisco provides the following sizing for KVM.
Edit the CD-ROM, and change operation to Clone from Image Service. Dropdown the image and find the image you uploaded previously, then select update. Select Add New Disk, and create a new disk of appropriate size, then click Add. Add a New NIC, and select the appropriate network, then click Add. Save to create the VM.
5. Before starting the VM, we need to run a few acli commands to configure the VM. Connect to any CVM in the cluster and run the following commands.
These commands will prevent AHV from impersonating Hyper-V and create a virtual serial port on the VM (this is required to boot the image).
nutanix@CVM:~$ acli vm.serial_port_create vmName type=kServer index=0
nutanix@CVM:~$ acli vm.update vmName extra_flags=”enable_hyperv_clock=False”
nutanix@CVM:~$ acli vm.update vmName disable_branding=true
That's it! Now you can start the ISE VM and watch the installation proceed.
